Fightplane Tools
Your hand-crafted battlemaps in RPG Maker.
Download
Get the plugin
Free, no account needed. Built for RPG Maker MV.
Download Fightplane RPG Maker MZ-MV Battlemaps.zipVideo
Quickstart Guide
Setup
Installation
- 1
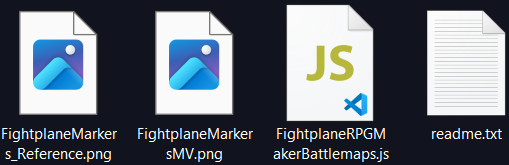
Put the files in your project folder
Game › Open Folder opens the project on disk. Three things go in:
FightplaneMarkersMV.pngimg/tilesets/FightplaneRPGMakerBattlemaps.jsjs/plugins/- Your battlemap (scaled using the tool below).
img/parallaxes/
Directly in those folders, not in a subfolder — RPG Maker only looks one level deep.
- 2
Activate the plugin
Tools › Plugin Manager, double-click an empty row, and pick
FightplaneRPGMakerBattlemapsfrom the list. OK, then OK again. - 3
Add the marker tileset
Tools › Database, then the Tilesets tab. Change Maximum and raise it by one to make an empty slot, then select the new slot and name it
Fightplane. Under Images, set B toFightplaneMarkersMV. - 4
Set each marker's passage
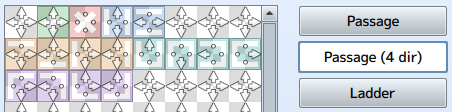
Still on the same tileset, click Passage (4 dir) on the right, then click the edges of each marker tile until it matches its picture: an arrow on every open side, a dot on every walled one. The marker reference below shows what each tile does. OK.
In the editor
Make a map from a battlemap
Once per map. The grid numbers here are the same two you gave the rescaler.
- 1
Scale your battlemap to the grid
Before anything else, resize the map with the rescaler below, so one square in the image is exactly one 48px tile. Enter the grid size of your map, then Rescale.
- 2
Add the map to your project
Game › Open Folder again, and drop the map you just downloaded into
img/parallaxes/— directly in that folder, not a subfolder. - 3
Create a new map
Right-click your project in the map list and choose New Map. Set Tileset to
Fightplane, and set Width and Height to match the map’s grid size. - 4
Pick the battlemap as the parallax
In the same dialog, under Parallax Background, choose your rescaled battlemap from
img/parallaxes. - 5
Paint marker tiles to mark walls and one-way edges
Open the B tab of the tile palette and paint markers over the squares that should block or steer the player — see walls and one-way edges below. The markers only show in the editor; in the game the player sees your battlemap.
- 6
Playtest
Walk around it. If the image slides against the player as you move, the plugin isn’t on — check Plugin Manager’s Status column.
Passability
Walls and one-way edges
Unlike a map made with tilesets, hand-crafted maps don't include wall data. The marker tiles let you draw it in.
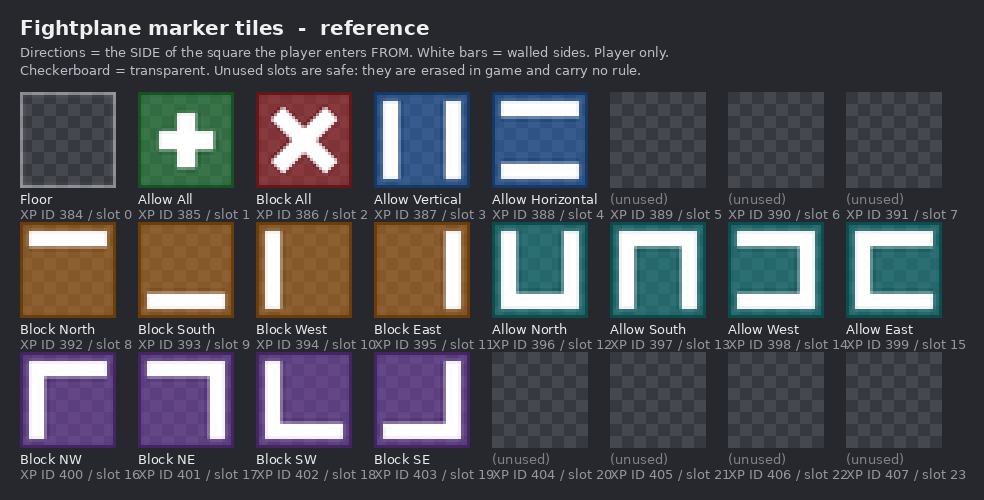
Each marker on the Fightplane tileset’s B tab sets how the player may enter the square it’s painted on. For most maps you’ll only need Block All, painted over every square the player shouldn’t stand on. For more complex maps, the directional markers wall off single sides and corners.
Blocking works one way
A marker stops the player entering a square from a side, not leaving it. A Block North square can’t be walked into from the north, but a player standing on it can still walk out northward.
Marker tiles
| Marker | What it does to the square |
|---|---|
| Floor | No rule. The same as painting nothing. |
| Block All | A full wall. The player can't enter from any side. |
| Allow All | Enterable from every side. |
| Allow Vertical / Allow Horizontal | Enterable only from the top and bottom, or only from the left and right — a crack or gap you can pass through one way round. |
| Block North / South / West / East | Blocks entry from that one side only. A cliff edge you can drop off but not climb back up. |
| Allow North / South / West / East | The mirror: enterable from that one side only. A gate that opens one way. |
| Block NW / NE / SW / SE | A wall corner in that corner of the square: blocks the two sides it touches, leaves the other two open. |
Example: Maze (by Map Doctor)
Used together, the markers can describe any wall or edge layout, as complex as you can imagine.
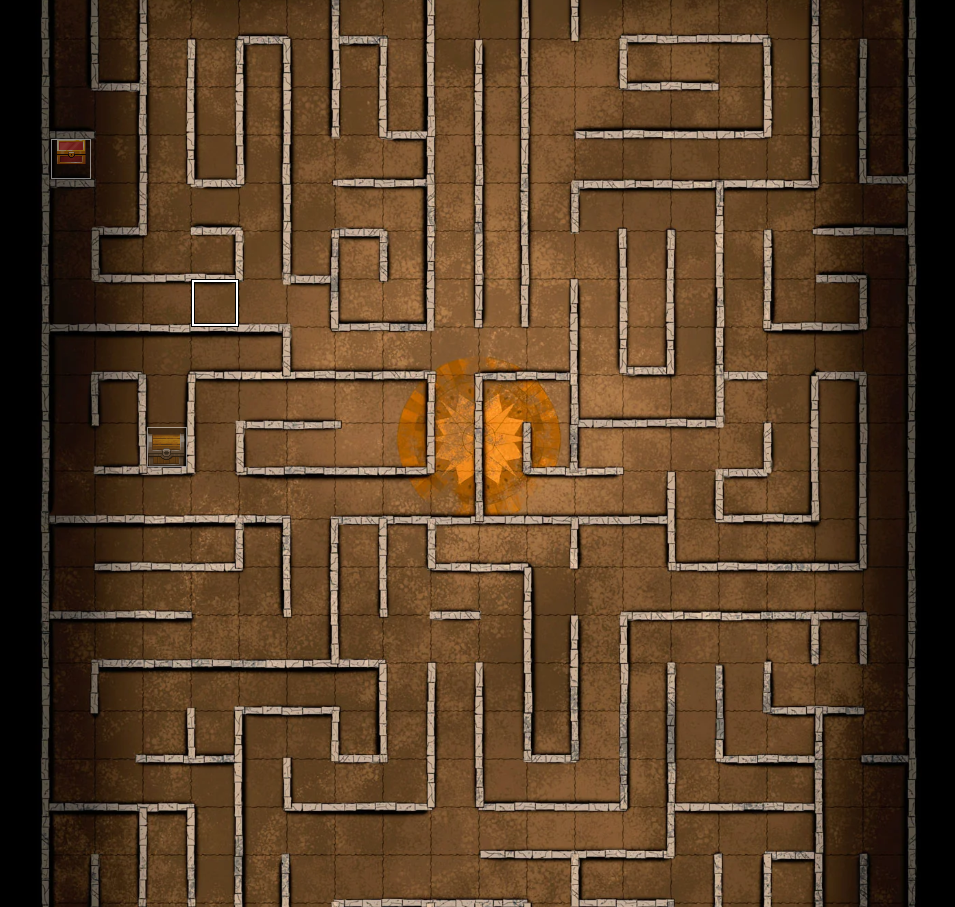
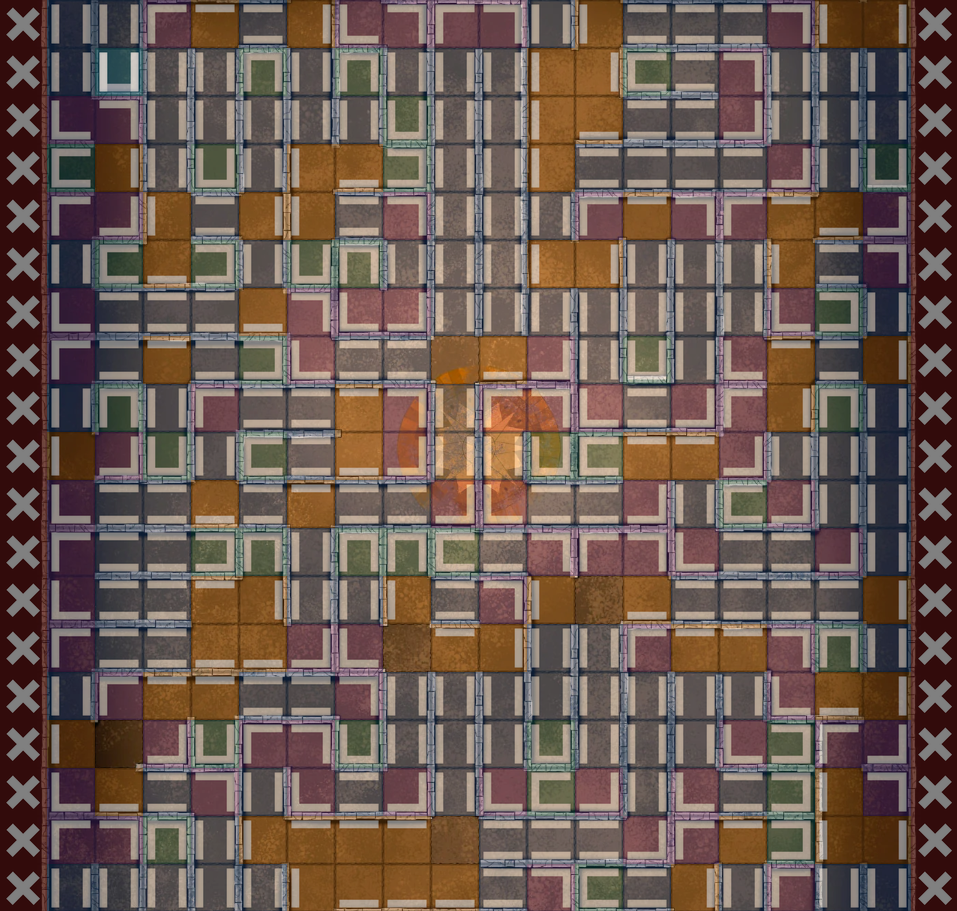
Maze battlemap by Map Doctor.
The tool
Rescale a map to the grid
Drop in a map and tell it how many squares across and down the map is. It resizes the map to 48px per square, the grid RPG Maker MV and MZ both use. Nothing is uploaded — the resizing happens in your own browser.
Counting the squares
Count the playable grid, not the picture. If your map has a decorative border outside the squares, crop it off first — otherwise the grid lands slightly out of true across the whole map. The tool tells you when your numbers and the image’s proportions disagree, which is usually what that means.
If something's off
Troubleshooting
The map slides against the player as I walk
That is RPG Maker scrolling the parallax at half speed, which is what the plugin overrides. Open Plugin Manager and check its Status is ON, and that the file is still named FightplaneRPGMakerBattlemaps.js.
The map doesn't appear in the parallax list
It has to be a PNG or JPEG sitting directly in img/parallaxes/. Restart the editor if you added it while the Map Properties dialog was open.
The player walks straight through walls
Walls are marker tiles you paint, not something the plugin can see in the picture. Check the map’s tileset is Fightplane, and that each marker’s Passage (4 dir) setting in the Database matches its picture.
The marker tiles show up in the game
The plugin hides them when the map loads, so seeing them means the plugin isn’t running — check its Status is ON in Plugin Manager.
Plugin Manager doesn't list the plugin
The file has to sit directly in js/plugins/, not in a subfolder, and it has to keep its original filename. Restart the editor after adding it.
The map looks soft or blurry
The rescaler had to enlarge it, which it warns about before you download. A map drawn at fewer pixels per square than your target tile size cannot gain detail it never had — you want a larger original, or fewer squares.
The grid is slightly out of line across the map
Almost always a margin outside the playable grid, or a square count that’s off by one. Crop the map to the grid itself and recount, then rescale again. The map’s Width and Height in squares must match the numbers you gave the rescaler.
It works in playtest but breaks on a phone or in a browser build
Check the output size. MV and MZ render through WebGL, and an image over 4096px on a side fails to load on a lot of hardware even though it is fine on a desktop. The rescaler flags this before you download.
The rescaler says my image is too large
Safari on iPhone and iPad refuses to decode images past roughly 16 megapixels. A desktop browser will open the same file.
Need a map?
Fightplane is the world’s most organized battlemap marketplace. (And the easiest and fastest platform on which to list your maps, too). While you’re here- check out the maps for sale. Or, if you’re a creator, sign up for a vendor account!